A mood board is a collage of inspiration—a subjective feeling, a color palette, a “vibe.” A tech pack is an objective, executable blueprint—a contract between designer and factory.
The single hardest step for emerging fashion brands is bridging the gap between these two stages. A factory cannot manufacture a “vibe.” They need precise measurements, standardized codes, and detailed construction instructions.
If you send a mood board to a manufacturer, they will ignore you. If you send a professional tech pack, they will quote you. Here is the step-by-step process of translating creative inspiration into technical data.
The Core Challenge: Subjective vs. Objective
The goal of translation is to remove ambiguity. Your interpretation of “vintage blue” is likely different from a factory manager’s interpretation in Vietnam or Portugal.
- The Mood Board Language (Subjective): “Soft,” “Slouchy fit,” “Retro wash,” “Earth tones.”
- The Tech Pack Language (Objective): “180 GSM Jersey,” “2-inch drop shoulder,” “Enzyme Wash Level 3,” “Pantone 16-1325 TCX.”
To successfully translate your vision, you must stop thinking like an artist and start thinking like an architect.
Phase 1: Deconstructing the Mood Board
Before you can build the tech pack, you must analyze your mood board and categorize every visual element. You are looking for four key pillars:
- Silhouette & Fit: Are the reference images oversized, slim, cropped, or tailored? Look at the shape, not the styling.
- Color Palette: What are the dominant colors and accent colors?
- Materials & Texture: Is the inspiration denim, knitwear, silk, or performance mesh? Is it matte or shiny?
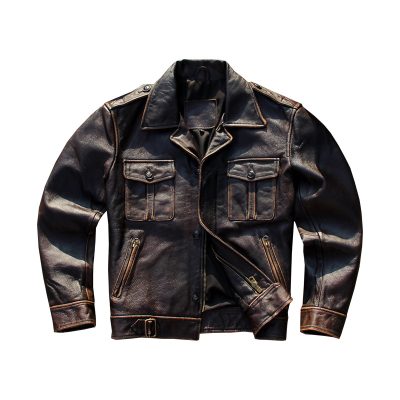
- Details & Trims: Are there visible zippers, specific button styles, embroidery, or unique pocket placements?
Phase 2: The Translation Toolkit
Once deconstructed, you need the right tools to standardize these elements into data that a factory understands.
1. Translating Color (The Pantone System)
Never use digital color pickers (HEX or RGB) for physical products. Textile factories require standardized physical color references.
- Tool: Pantone Fashion, Home + Interiors (FHI) system.
- Action: Match your mood board colors to physical Pantone chips (preferably TCX for cotton or TPG for paper/coatings) and list these codes in your tech pack.
2. Translating Fabric (Weight and Composition)
A picture of “soft fabric” on a mood board means nothing. You must define it by weight and content.
- Tool: A physical fabric swatch library or supplier sourcing.
- Action: Define the fabric by GSM (Grams per Square Meter) or oz/yd² (Ounces per Square Yard) and composition (e.g., “220 GSM, 95% Cotton / 5% Spandex French Terry”).
3. Translating Silhouette (The Flat Sketch)
A stylized fashion illustration is useless to a patternmaker. You need a technical flat sketch.
- Tool: Adobe Illustrator (industry standard).
- Action: Create a 2D, to-scale drawing of the garment laid flat, showing all seams, stitching lines, and hardware clearly, front and back.
Phase 3: Structuring the Tech Pack
Now, input your translated data into the structured sections of a tech pack.
Step 1: The Technical Flat and Callouts
Place your Adobe Illustrator flat sketch on the cover page. Use arrows and text (“callouts”) to highlight specific details derived from the mood board, such as “Ribbed cuff height: 2.5 inches” or “Double needle topstitch on hem.”
Step 2: The Bill of Materials (BOM)
This is the recipe for your garment. Every single component sourced from your mood board analysis goes here.
| Component | Description | Placement | Supplier/Code | Quantity per Unit |
| Main Fabric | 220 GSM Cotton Jersey | Body, Sleeves | Supplier A, Code #123 | 1.2 yards |
| Ribbing | 1×1 Cotton Spandex Rib | Neckband | Supplier A, Code #124 | 0.1 yards |
| Thread | Tex 40 Poly-Wrapped | All seams | DTM (Dyed to Match) | N/A |
| Main Label | Woven Brand Label | Center Back Neck | Supplier B | 1 |
Step 3: Measurements and Grading (POMs)
This is the most critical translation of silhouette. You must define the “Points of Measure” (POM) for your sample size (e.g., Size Medium).
Don’t just say “boxy fit.” Translate that into data:
- HPS (High Point Shoulder) to Hem: 28 inches.
- Chest Width (1″ below armhole): 23 inches.
- Sleeve Length from CB (Center Back): 35 inches.
Step 4: Construction Details
Translate the “quality feel” of your mood board into technical sewing instructions. Define the SPI (Stitches Per Inch)—higher SPI usually indicates higher quality—and the types of seams required (e.g., flatlock vs. overlock).
Summary Table: The Translation Matrix
Here is a quick reference guide on how subjective inputs become objective outputs.
| Mood Board Input (Subjective) | Translation Tool | Tech Pack Output (Objective Data) |
| “Earthy, warm beige tone” | Pantone Book (TCX/TPG) | Pantone 16-1325 TCX |
| “Heavy, high-quality feel” | GSM Calculation | 450 GSM Loopback French Terry |
| “Oversized, boxy look” | Technical Flat & Tape Measure | Chest Width: 24″ (Size M); Drop Shoulder seam |
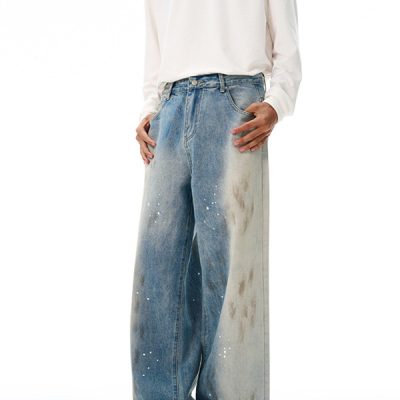
| “Vintage, worn-in seams” | Wash/Finish Specialist | Enzyme Wash Level 2 + Light grinding on hems |
| “Clean, minimalist finishing” | Stitching Dictionary | Blind Hem stitch; 12 SPI (Stitches Per Inch) |
Translating a mood board into a tech pack is the process of turning inspiration into instruction. By rigorously standardizing your colors, materials, and measurements, you ensure that the factory receives a clear blueprint, minimizing costly sampling errors and ensuring the final garment matches your initial vision.